Customizing the shop page of a WooCommerce website is still a challenge for many. A lot of WordPress users claim it is a pain when you build the whole website to be great looking and you cannot easily edit the shop page.
However, if you use a page builder plugin like Elementor, it isn’t really hard to customize the shop page the way you want it. It only requires editing a few Elementor templates and customizing some of its elements. And importantly, you don’t have to touch a single line of code.
Now let’s go ahead and find out how we can do this step by step.
Step 1: Make sure you have the right set up: Elementor Pro & WooCommerce
I’m assuming you have built the whole website on Elementor and you already have it installed and activated on your website. You will also require the Elementor Pro version to customize your WooCommerce shop page easily.
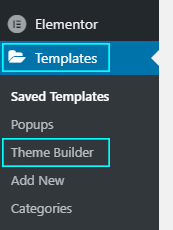
Step 2: Go to ‘templates’ in Elementor
To customize the shop page you will first need to click on the ‘templates’ option under Elementor and then click on ‘theme builder’. You can see this on the WordPress dashboard on the left-side column. (see below image)
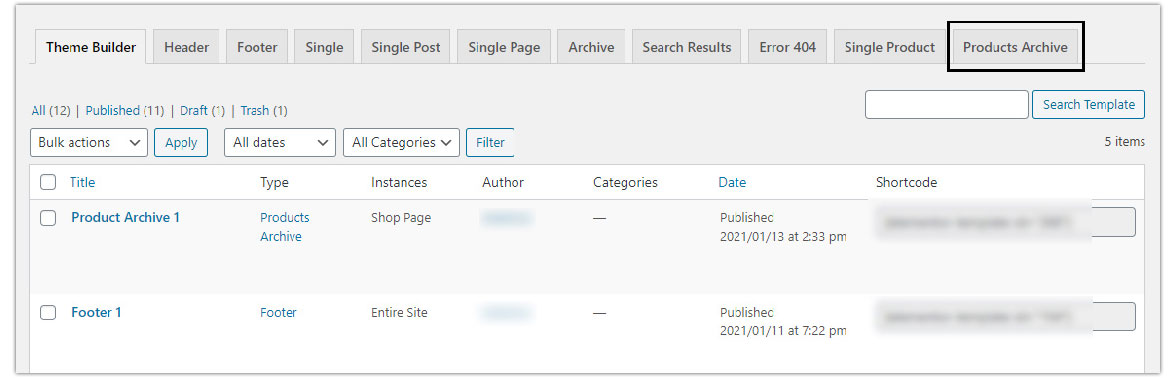
Step 3: Find the ‘Product Archive’ tab
Once you are within the ‘theme builder’ area, you can go ahead and click on ‘product archive’ as the next step. (see below image)
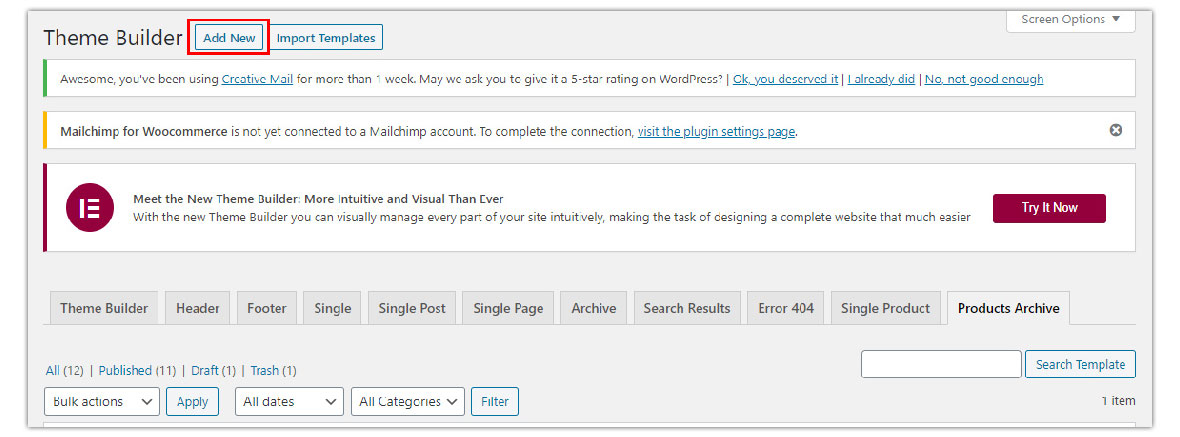
Step 4: Create a new product archive template
Inside the ‘products archive’ tab, click on the ‘add new’ option at the top to create a new product archive template. (see below image)
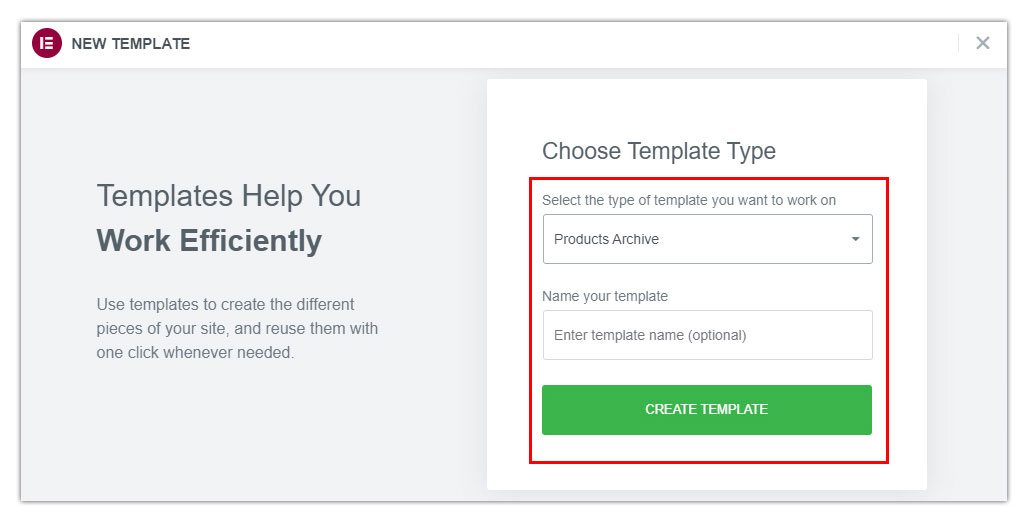
Once you click on the ‘add new’ option, a pop-up will appear where you will have the option to choose the template type and assign it a name. By default, you should be getting ‘product archive’ in the drop-down field to choose the template type. If not, make sure you choose the ‘product archive’ template type. (see below image)
Naming the template is optional, but it would be good if you can assign a name. Once these steps are completed, you can go ahead and click on the ‘create template’ button.
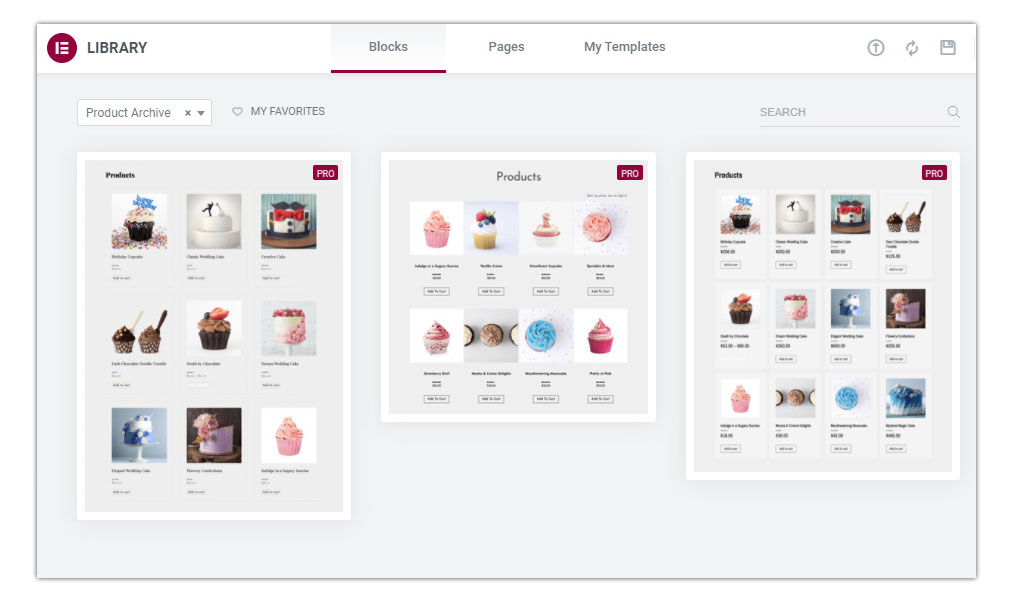
Once you click on the ‘create template’ button, you will be taken to a screen where you can choose any one of the pre-built Elementor templates for product archive pages. You can either use these templates directly on your shop page or customize them the way you want. All you have to do here is just choose one template and ‘insert’ it on to the page.
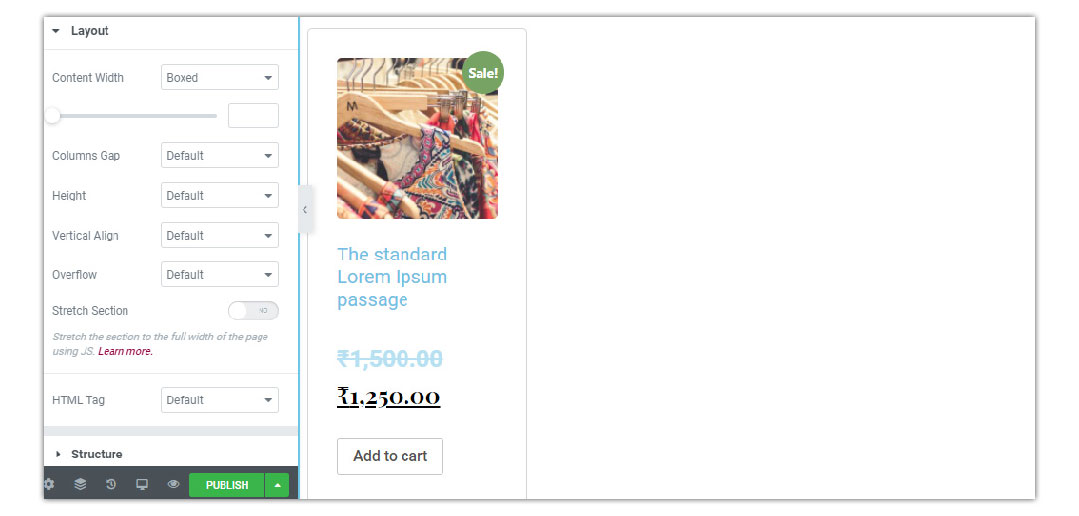
After inserting one of the pre-built templates, you will be taken to a screen where you can edit and customize the Elementor template. I’m assuming you are already familiar with Elementor page builder and its customization. So just make all the changes you need on the template and build a cool looking shop page.
How to add a sidebar to the WooCommerce shop page using Elementor?
One important point worth mentioning here is the sidebars. Many users would want to add a sidebar to the template to showcase product categories or filters. All you have to do here is to add a sidebar element from Elementor to a new column on the template. Then you can add any of the product categories or filters to the sidebar widgets. (Please note the sidebar element will be available only on the Pro version of Elementor.)
Step 5: Publish the template on to your shop page
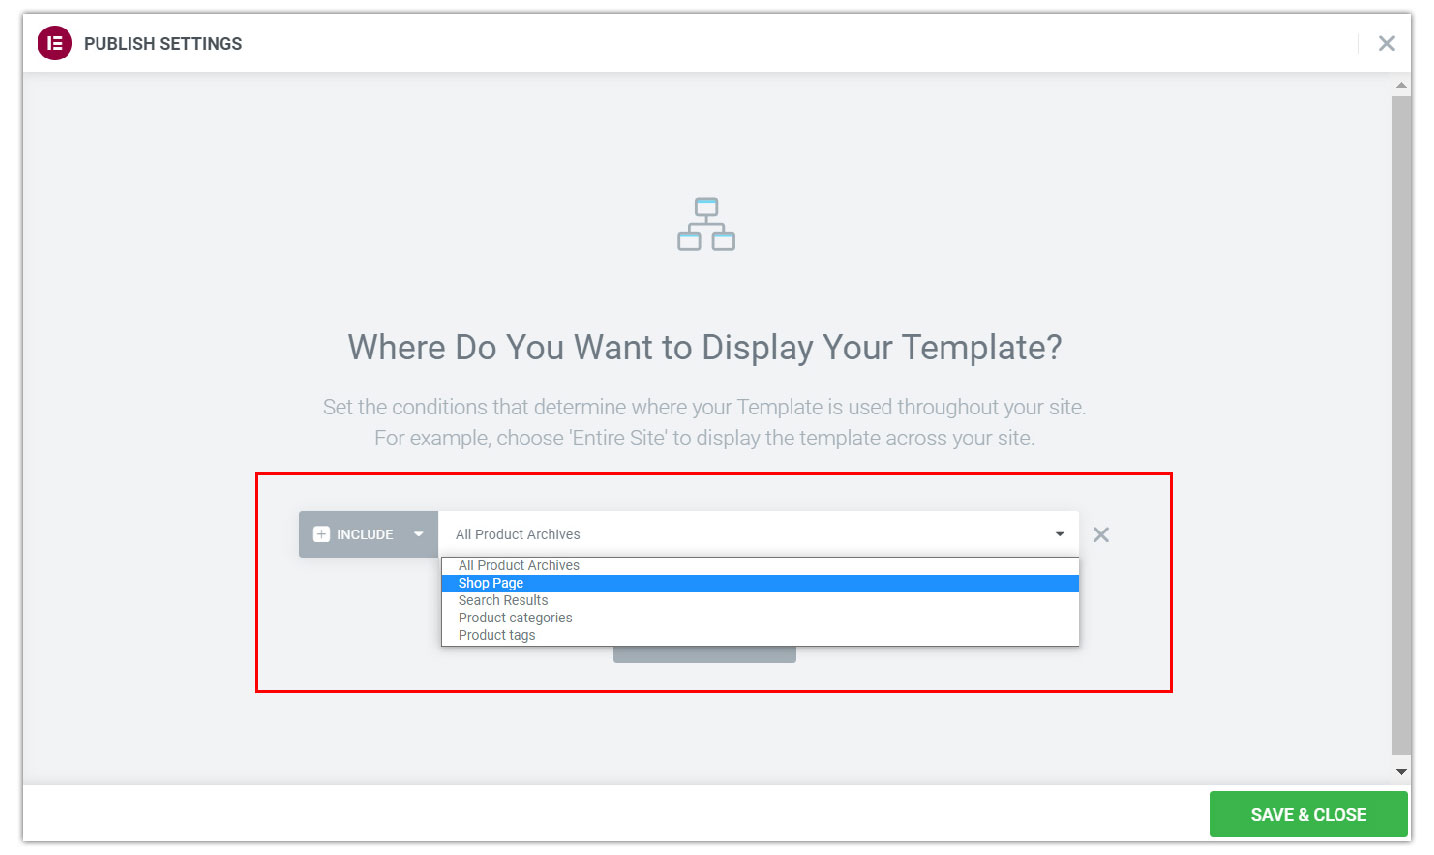
Once all the changes are made to the template, you can go ahead and publish it. When you click on the ‘publish’ button, Elementor would ask you to choose the page on which you want to apply this template.
Here, just click on ‘add condition’, and from the next screen choose ‘include’ and then ‘shop page’. Now you have assigned this template to the WooCommerce shop page. As the next step, you can click on the ‘save & close’ button below and you’re done.

Conclusion
Now you can see a beautiful shop page on the front end just like you customized it on the template. All the products that you add to your WooCommerce store will get updated on this shop page. You can always go back to your templates under Elementor and find this template under ‘product archives’ to make any future changes.
If you are building an e-commerce website using WooCommerce and Elementor Pro, this is the easiest way to get your shop page customized.
Hope this helps.
Leave a Reply